The Thrifty College House

After a summer of decorating, crafting, and planning, the thrifty college house is complete. The goal was to transform an average, run down college house into somewhere where my best friend and I can study, relax, and escape from our crazy schedules. Without spending more than $35 on a single piece, we turned our boring little house into a cute, eclectic home that we love and can’t wait to share with our friends. Most importantly, we now have our own little niche where we can learn, grow, be inspired, and finish our last couple of years as Spartans.

Chalkboard, DIY $3

We decided to use the chalkboard as a calendar for upcoming concerts we are planning on going to.

Table and Chairs, Kat’s Grandma

White Mugs, Thrifted $ .85

Lamp, Ikea $10

End table, Backyard tree stump

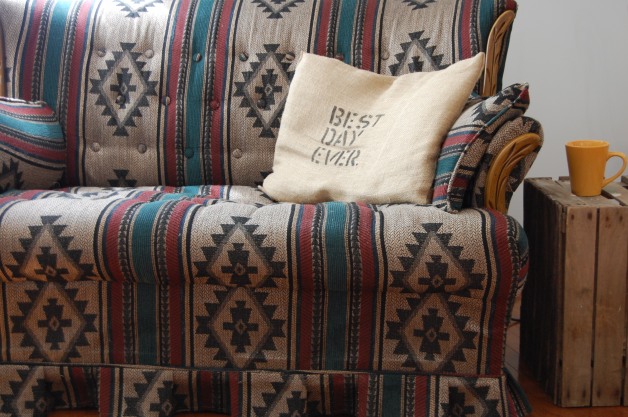
Couch, Thrifted $35

Map Wall Art, DIY

Loveseat, Craigslist (free)

“Best Day Ever” Pillow, DIY

Wood Crate, Estate Sale $ .50

Yellow Mug, Thrifted $1

Bookshelf, Estate Sale $20

Big Wood Frame, Estate Sale $1

Painted Antlers, (Thanks, Dad!)

Green Chair, From family friend (free)

Repurposed Wood Pallets

Wood pallet projects seem to be the new trend on Pinterest- and when a friend offered me some for free, I couldn’t resist! My first project was a table. Let me warn you, this was a project of improvisation and “Dad’s not home so no power tools”. With that being said, my supplies included:

  • One wood pallet
  • Wood blocks for legs (1.29 x 2 at Lowe’s)
  • Stain
  • Sand Paper
  • Liquid nails (wood glue or gorilla glue should work too)
  • Bungee cords (Hey, it did the trick!)

I started off by sanding down the pallet to avoid slivers. Next, I turned it upside down and glued the legs on with liquid nails, one by one, securing them with bungee cords. Obviously, clamps would be more ideal, but I couldn’t find any.


Next, let it dry. The liquid nails probably should dry for 24 hours, but I lasted about 5. The longer the better! When the table was dry enough, I turned it over and finished it off by staining it with maple stain that I found in the garage. Even with limited supplies and tools, I’m excited about how the table turned out!

After the construction of my (somewhat awkward) table, I still hadn’t had enough of wood pallets. I was, however, ready for a simpler project. I looked at the next pallet, turned it around, leaned it against the wall, and eventually decided, “This is going to be a bookshelf.”

I recently found a distressed painting tutorial I’ve been wanting to try out (sorry I can’t remember the link!) and so I used that for my new bookshelf. Simply clean the wood, sand, paint on color, dry, paint over with another color, dry, stain, and wipe off. The key is to paint very lightly leaving traces of wood.

After the paint was dry, I stenciled on “Read More Books”, painted the letters, and added books!

After spending some quality time with my wood pallets, I see what all the hype is about! In a lot of ways, using pallets is like starting mid-craft. Happy crafting, friends :)